VEITH Pin Table — Polo Shirts
Used in manufacturing polo shirts from yarn dyed knitted fabric
The following pictures demonstrate the process of matching a yarn dyed knitted fabric.
The preparation part prior to the real spreading and matching consists of the following steps:
- measuring the fabric, i.e.:
- fabric width
- repeat of the fabric
- inclination of the fabric
- calculating the start parameters for marker making in the VEITH PinIT software
- marker making using a professional CAD software
- importing the marker data into VEITH PinIT
- planning the needle bar positions in PinIT — this step will synchronize the marker data, the fabric repeat and the needle bar positions
- printing the report with all relevant data for setting up the VEITH Pin Table
- setting the needle bars according to the positions shown in the PinIT report
- before the real spreading of fabric can start, a piece of underlay paper needs to be put on the pin table
Process Steps
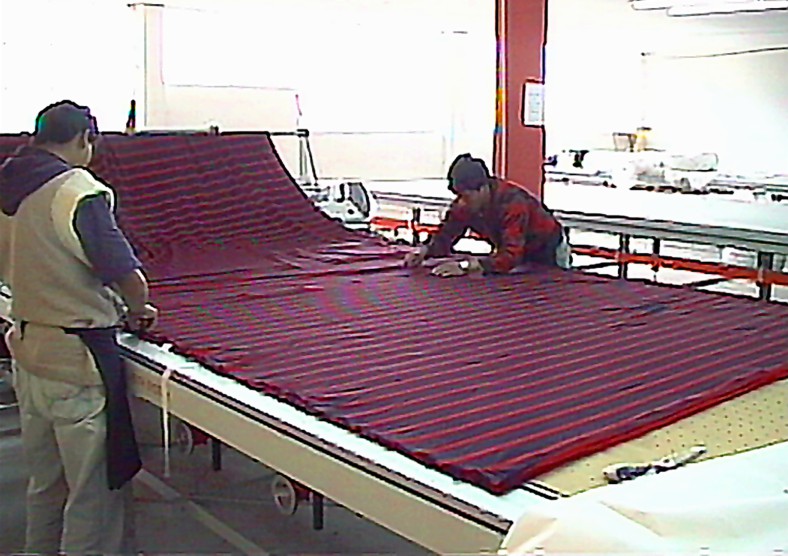
1. Spreading and Matching
- Spreading knitted fabric on a VEITH Pin Table. Spreading and matching by pinning is a combined work step.

2. Cutting the End
- After spreading, each ply will be cut at the end
- in case of piquet fabric (0° inclination) the VEITH Cutting Device can be used
- else a classic end cutter from a 3rd party can be used, we supply a special adapter for this kind of end cutters
- or else by hand
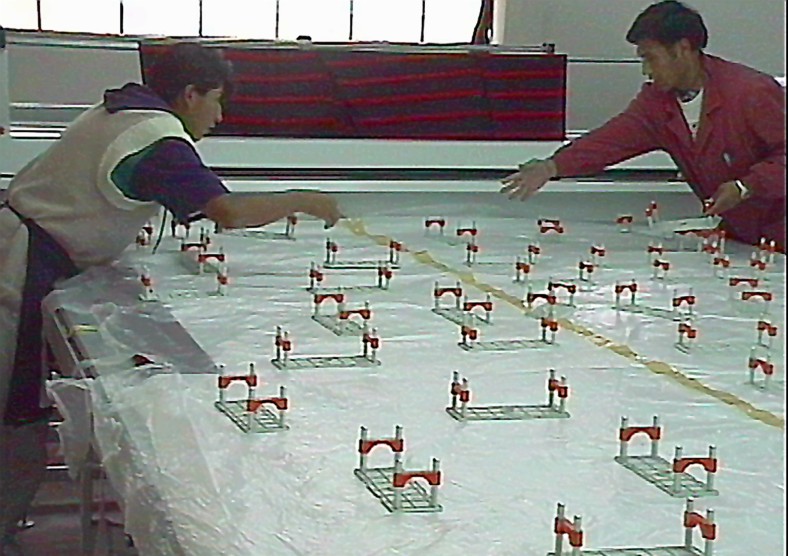
3. Securing the Lay Package
- Before moving the finished lay to cutting, it is fixed with help of the VEITH Needle Plates

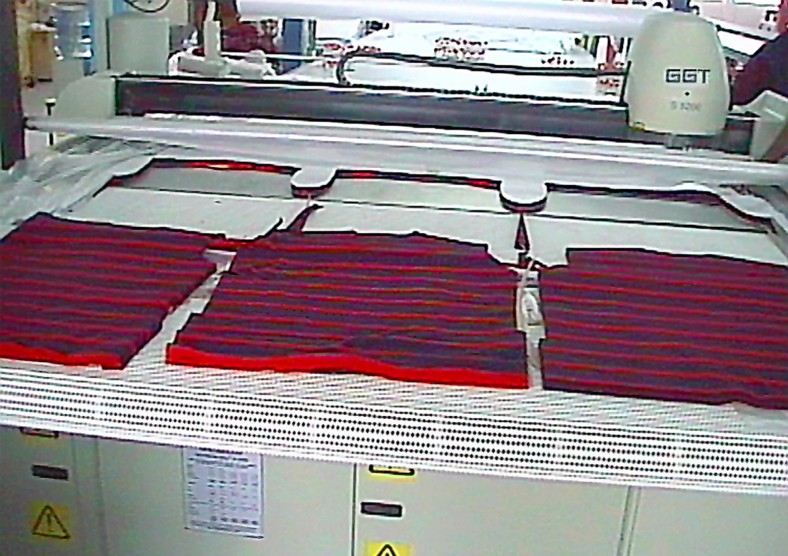
4. Cutting on Cutter
- In our example the lay package is cut on an automatic cutter.
5. The Result
- no panel cutting
- no blocking
- no relaying
- JUST IMMEDIATE NET CUT
AND
- SAVE FABRIC

6. Alternative — Cutting Manual
- Manual cutting of the lays is of course also possible.
BUT AGAIN
- no panel cutting
- no blocking
- no relaying
- JUST IMMEDIATE NET CUT
AND
- SAVE FABRIC
VEITH SYSTEM — COMPETENCE in MATCHING CHECKS, STRIPES and PATTERNS